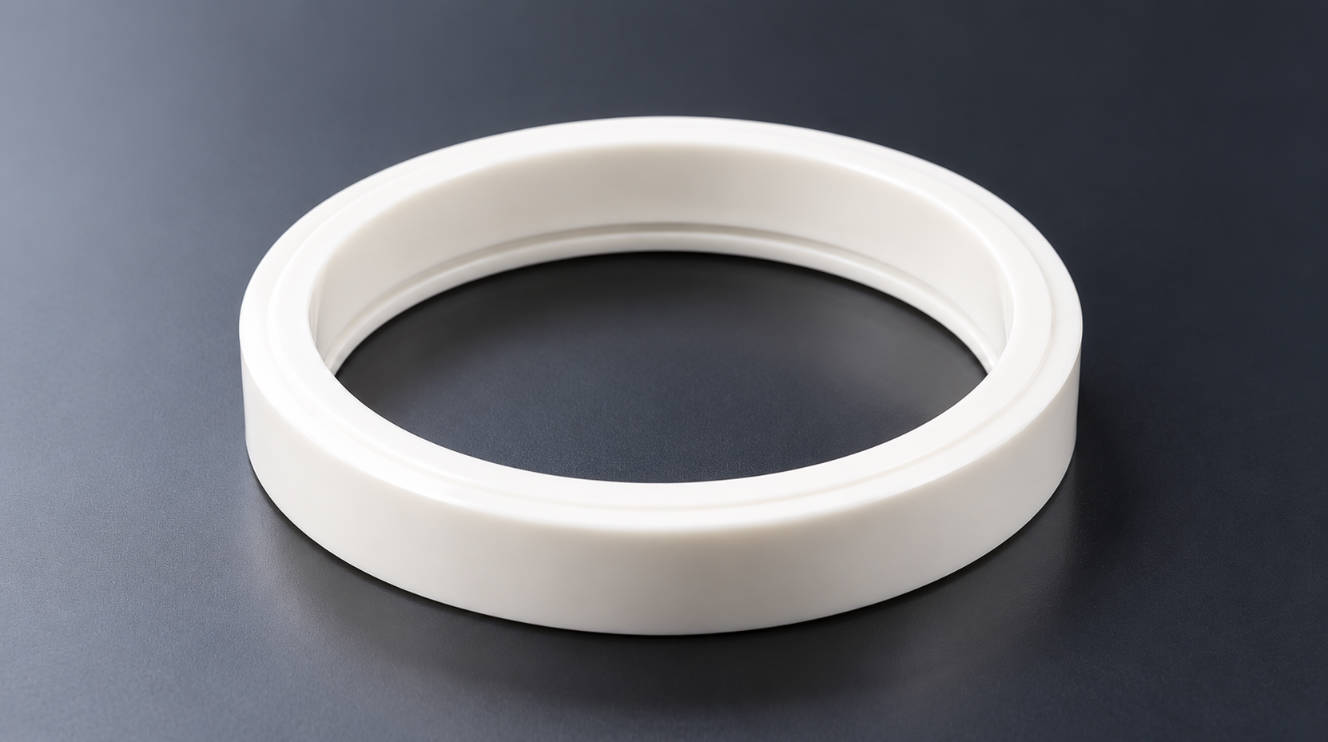
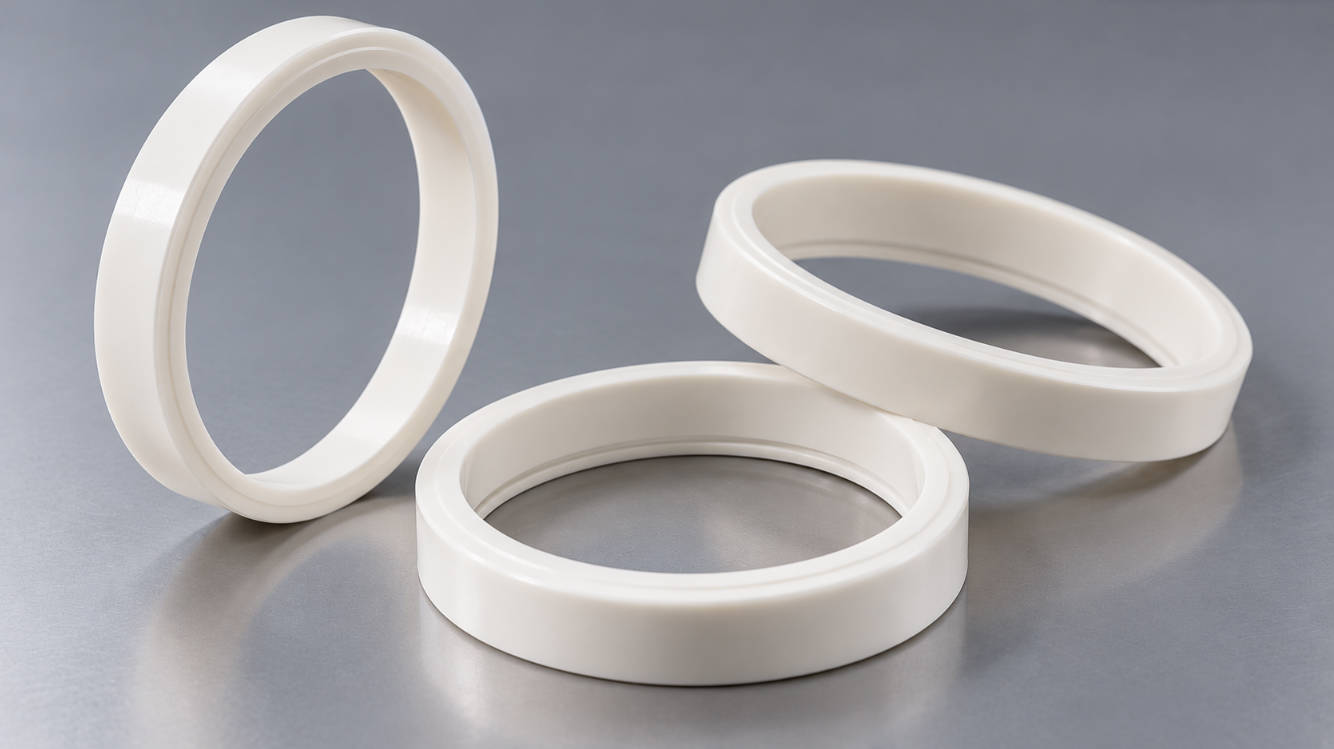
Replacing a pad printing ink cup ring sounds straightforward until you discover that two rings with the same nominal diameter may have different heights, blade profiles, or mounting dimensions.
For example, a 90 × 82 × 12 mm ceramic ring is not necessarily interchangeable with a 90 × 82 × 13 mm ring. Both have the same outer and inner diameters, but their heights and cutting-edge configurations may differ.
Ordering the wrong replacement can lead to poor sealing, ink leakage, uneven doctoring, or difficulty installing the ring into the ink cup.
To identify a replacement pad printing ink cup ring, measure three primary dimensions: outer diameter (OD), inner diameter (ID), and height (H). Then confirm the blade configuration, bevel profile, ring material, and mounting compatibility.
This guide explains how to take these measurements using a digital caliper, interpret common ceramic ring sizes, and prepare the information a supplier needs to identify the correct replacement.
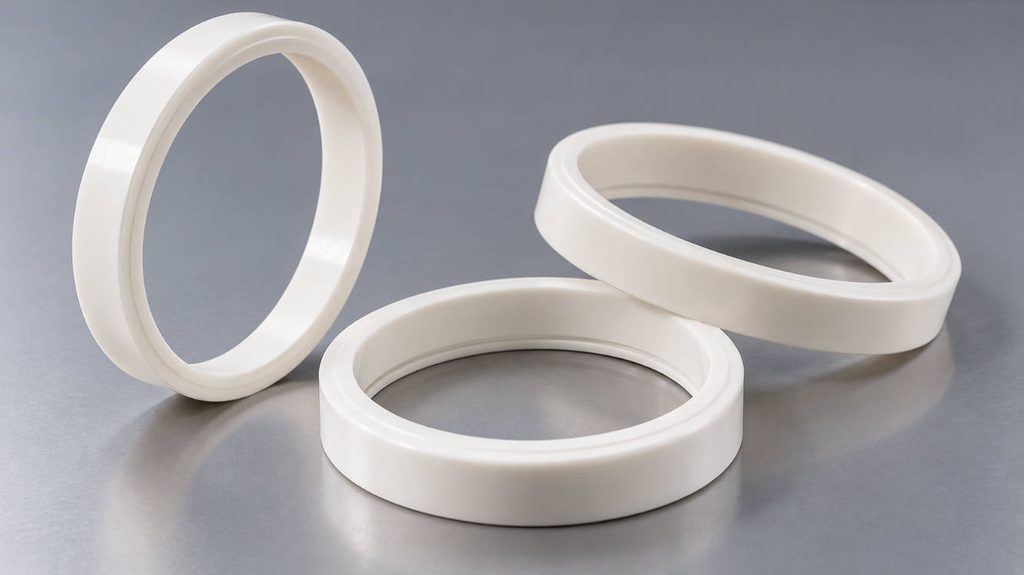
Know These Measurements Before Ordering
A ceramic doctor ring is a precision component of the closed ink cup system. Its dimensions determine whether it fits the cup body and maintains the intended contact with the printing plate.
The three primary measurements are:
| Measurement | Abbreviation | What It Means | Why It Matters |
|---|---|---|---|
| Outer Diameter | OD | Distance across the outside of the ring | Determines external fit and clearance |
| Inner Diameter | ID | Distance across the internal opening | Determines compatibility with the cup’s mounting geometry |
| Ring Height | H | Overall axial height of the ring | Affects installation and contact geometry |
| Blade Configuration | SS / SD / DS / DD | Number of working edges and bevel design | Determines compatibility with the original doctoring arrangement |
| Ring Material | — | Ceramic, carbide, or another specified material | Affects wear characteristics and application suitability |
For a typical round ring, replacement dimensions are commonly expressed in millimeters as:
OD × ID × H
For example:
90 × 82 × 12 mm
This identifies a ring with:
- Outer diameter: 90 mm
- Inner diameter: 82 mm
- Overall height: 12 mm
However, the three dimensions alone do not establish complete compatibility. The blade geometry must also match the application.
What Tools Do You Need to Measure an Ink Cup Ring?
For most routine replacement inquiries, the essential equipment is relatively simple.
A digital vernier caliper with millimeter readings is the most practical starting point. A caliper displaying 0.01 mm increments can help document dimensions consistently, although its display resolution should not be confused with guaranteed measurement accuracy.
You will also need a clean work surface, suitable cleaning materials, adequate lighting, and a camera or smartphone for recording the ring’s profile.
A magnifying glass can be helpful when inspecting small chips or identifying the shape of the doctoring edge.
Before taking measurements, stop the pad printing machine and isolate its power and compressed air supply according to the manufacturer’s instructions.
Remove the ring carefully from the ink cup assembly. Ceramic components can chip if dropped or subjected to concentrated impact.
Clean away any ink residue using approved cleaning methods, and allow the part to dry before measuring.
Do not take measurements over hardened ink deposits. Even a thin layer of dried ink can produce misleading readings.
Step-by-Step: How to Measure a Ceramic Ink Cup Ring
Step 1: Measure the Outer Diameter (OD)
The outer diameter is the maximum external diameter of the ring’s specified cylindrical body.
Place the ring on a clean, stable surface. Open the outside jaws of the digital caliper and position them against opposite sides of the ring.
Close the jaws gently until they make contact without applying excessive force.
Read and record the measurement in millimeters.
For better accuracy, rotate the ring and measure at several positions. On a round ring, readings should be reasonably consistent, allowing for manufacturing tolerances and measurement uncertainty.
If the measurements vary significantly, inspect for damage, debris, or an unusual ring geometry.
Avoid placing the caliper jaws directly against a fragile cutting edge when a suitable cylindrical measurement surface is available.
For rings with stepped bodies or different diameters at different heights, record each relevant dimension instead of reporting only the maximum OD.
Step 2: Measure the Inner Diameter (ID)
Next, use the inside jaws of the caliper to measure the ring’s internal opening.
Insert the jaws carefully and expand them until they contact opposite inner surfaces.
Keep the caliper aligned across the diameter rather than holding it diagonally or at an angle.
Repeat the measurement at different positions to check for inconsistencies.
For example, a ring with an outer diameter of 90 mm may have an inner diameter of 82 mm, giving the nominal specification 90 × 82 mm before height is considered.
Do not assume that all 90 mm rings have an 82 mm inner diameter. Different ring designs can have different wall thicknesses and internal openings.
If the ring has an internal groove, taper, or stepped mounting surface, measure the relevant features separately and provide photographs.
These details may affect how the ring seats inside the ink cup.
Step 3: Measure the Ring Height (H)
Ring height is another critical measurement that buyers frequently overlook.
Place the ring on a suitable flat surface in a stable position. Use the caliper to measure its overall axial height, taking care not to damage the doctoring edge.
For a double-edged ring, overall height normally includes both opposing edge features.
If the ring has a stepped profile, record the overall height and any distinct body or seating dimensions.
Consider these two replacement specifications:
| Specification | Outer Diameter | Inner Diameter | Height |
|---|---|---|---|
| Ring A | 90 mm | 82 mm | 12 mm |
| Ring B | 90 mm | 82 mm | 13 mm |
The diameter measurements are identical, but the overall heights differ by 1 mm.
That difference may affect mounting, compression, and contact with the printing plate.
A shorter or taller ring should not be installed simply because it fits into the cup opening.
If the original ring has experienced significant wear or has been reground, its current height may not represent the original specification. Compare it with an unused spare, drawing, or verified part number whenever possible.
Step 4: Identify the Blade and Bevel Configuration
After measuring OD, ID, and height, examine the ring’s cutting-edge design.
ENGYPRINT identifies four common blade and bevel configurations:
| Code | Blade Configuration | Bevel Configuration |
|---|---|---|
| SS | Single Blade | Single Bevel |
| SD | Single Blade | Double Bevel |
| DS | Double Blade | Single Bevel |
| DD | Double Blade | Double Bevel |
The number of working edges and the bevel profile are separate characteristics.
A single-blade design has one intended working edge, while a double-blade design has working edges on both sides, subject to the specific construction.
Single- and double-bevel designs also differ in the surfaces forming the cutting edge.
Two rings with identical OD, ID, and height may still be incompatible if their blade profiles differ.
Photograph the ring from the side to document its cross-section, including the position and angle of the beveled surfaces.
Do not estimate a precise bevel angle from a photograph if the supplier requires a controlled measurement. In that case, provide a technical drawing or physical sample for confirmation.
You can review ENGYPRINT’sceramic ink cup rings for available edge designs and replacement options.
Common Pad Printing Ink Cup Ring Sizes
Standard replacement rings are available in various diameters and heights.
The following specifications are examples listed in ENGYPRINT’s pad printing consumables range.
| Outer Diameter (mm) | Inner Diameter (mm) | Height (mm) | Blade / Bevel Type |
|---|---|---|---|
| 65 | 60 | 5.2 | SS |
| 95 | 90 | 5.2 | SS |
| 60 | 53 | 12 | SD |
| 70 | 60 | 12 | SS |
| 80 | 70 | 12 | SS |
| 90 | 82 | 12 | SS |
| 90 | 82 | 13 | DD |
| 100 | 90 | 12 | SS |
| 120 | 110 | 12 | SS |
| 130 | 120 | 12 | DD |
| 140 | 130 | 12 | SS |
| 160 | 150 | 12 | SS |
| 200 | 190 | 12 | SS |
These dimensions are reference specifications, not universal interchangeability standards. Availability and suitable mounting configurations should be confirmed before ordering.
Notice how several rings share similar diameters but have different heights or blade configurations.
In particular, the 90 × 82 mm examples illustrate why selecting a ring using diameter alone can be misleading.
Many industrial buyers search for replacement parts using descriptions such as “90mm ceramic ink cup ring” or “pad printing doctor ring 90mm.”
These descriptions are useful for an initial search, but they are not always sufficient for a purchase order.
For a complete selection of replacement components, see ENGYPRINT’spad printing consumables.
Why the Nominal Ink Cup Size Can Be Misleading
One of the most common purchasing mistakes is assuming that the advertised ink cup size is always the ceramic ring’s outer diameter.
Manufacturers and distributors may use different naming conventions.
Depending on the product range, a nominal size may refer to the ring’s inner diameter, outer diameter, usable ink area, or an equipment-specific designation.
Consider an ink cup described as a “90 mm ink cup.”
Without a drawing or product specification, that description does not guarantee that the replacement ring has a 90 mm outer diameter.
This is particularly important when ordering consumables from a supplier other than the original equipment manufacturer.
The safest approach is to verify the actual installed ring dimensions and compare them with the supplier’s drawing.
A machine model number can help identify a compatible part, but it should not replace dimensional verification when uncertainty exists.
For replacementsealed ink cup assemblies, the cup body, retaining design, ring dimensions, and sealing arrangement must work together.
What If the Original Ring Is Broken or Too Worn to Measure?
Not every replacement request begins with an intact component.
A ceramic ring may have a chipped edge, broken section, or worn contact surface that makes direct measurement less reliable.
In these situations, there are several practical ways to identify the correct replacement.
Use an unused spare ring. If another identical machine or cup assembly is available, measuring an undamaged reference part can be more reliable than measuring the failed component.
Check the original documentation. A maintenance manual, parts list, previous purchase order, or technical drawing may contain the necessary dimensions.
Measure the cup’s ring seat. If no usable ring is available, the retaining recess and related mounting features can help establish the required dimensions. However, these measurements should be interpreted by the supplier rather than treated as exact ring dimensions.
Provide a physical sample. If the ring has an unusual profile, sending a sample for inspection and measurement may be the most reliable option.
A damaged ring should not be reconstructed by estimating missing dimensions from photographs alone.
For customized replacements, accurate drawings and reference samples help reduce the risk of producing components that fit physically but do not maintain the correct doctoring contact.
How to Measure an Oval Ink Cup Ring
Oval ink cup rings require a different measurement approach.
Unlike round rings, they cannot be described adequately using a single inner diameter and outer diameter.
Instead, record the overall external length and width, internal opening length and width, overall height, and the blade configuration.
For example, an oval ring measurement record might include:
| Measurement | Description |
|---|---|
| Outer Length | Maximum overall length |
| Outer Width | Maximum overall width |
| Inner Length | Length of the internal opening |
| Inner Width | Width of the internal opening |
| Height | Overall axial height |
| Blade Profile | Single/double edge and bevel configuration |
These measurements are necessary, but they may not fully define a customized oval profile.
Two oval rings can have the same length and width while differing in corner radii or the shape of their straight and curved sections.
Therefore, a technical drawing or physical sample is particularly important for nonstandard designs.
Oval rings are often used where elongated artwork benefits from a longer printing area without requiring an equally large circular ink cup.
ENGYPRINT providesoval ceramic rings for pad printing ink cups, including customized specifications.
Ceramic or Carbide: Should You Change Materials When Replacing a Ring?
When replacing a worn ceramic doctor ring, some buyers consider switching to carbide for improved wear resistance.
Both ceramic and tungsten carbide rings are used in industrial pad printing, but material selection should be evaluated separately from dimensional compatibility.
A replacement ring must first match the cup’s mounting and working geometry.
Changing the material does not correct an incorrect height, incompatible blade profile, or poorly aligned ink cup.
Ceramic rings, including zirconia designs, are widely used for their wear resistance and consistent doctoring characteristics.
Carbide rings may be considered for demanding operating conditions, depending on the ink, printing plate, and production requirements.
Before changing materials, verify the machine manufacturer’s recommendations and the compatibility of the ring with the printing plate.
For additional product information, explore ENGYPRINT’scarbide rings for pad printing ink cups.
Replacement Ring Ordering Checklist
Once the measurements are complete, the next step is communicating them clearly to your supplier.
A useful inquiry should include more than the statement “I need a ceramic ring for a 90 mm ink cup.”
Prepare the following information:
| Required Information | Example or Explanation |
|---|---|
| Ring Shape | Round or oval |
| Outer Diameter | 90 mm |
| Inner Diameter | 82 mm |
| Overall Height | 12 mm |
| Material | Zirconia ceramic |
| Blade Configuration | SS, SD, DS, or DD |
| Machine Information | Manufacturer and model, if known |
| Cup Information | Model, part number, or photographs |
| Quantity | Number of replacement rings required |
| Supporting Materials | Ring photos, drawing, or physical sample |
The dimensions above are illustrative and should be replaced with the actual measurements.
For a standard circular ring, take at least three photographs: a top view showing its overall shape, a side view showing its height and bevel, and a photograph of the ring installed in or beside the ink cup.
Include a caliper in the photographs where practical so the supplier can see exactly which features were measured.
If any reading is uncertain, state that explicitly rather than rounding the value to match a familiar catalog size.
For nonstandard rings, a dimensioned drawing is preferable to relying on photographs alone.
The objective is to identify a technically compatible replacement, not simply the closest catalog listing.
How to Check a Replacement Ring Before Production
Even when the dimensions have been confirmed, the replacement should be inspected before the pad printing machine returns to normal production.
Start with a visual inspection.
Check the ceramic ring for visible chips, cracks, or manufacturing damage. Ensure that its mounting surfaces and cutting edge are clean.
Compare the replacement with the original component or approved drawing.
Confirm that it seats properly in the cup without being forced into position.
Do not modify the ring by grinding or sanding unless the procedure is specifically approved and suitable precision equipment is available.
Reinstall the assembly according to the machine manufacturer’s instructions, including any seals, retainers, and contact-force settings.
After installation, conduct a controlled low-speed test and examine the printing plate for ink streaks, unusual contact marks, or leakage.
If the new ring does not scrape correctly, do not immediately increase downward pressure. Recheck its dimensions, alignment, blade profile, and installation.
A correctly selected ring is only one part of a properly functioning closed ink cup system.
Frequently Asked Questions
How do I know what size ceramic ring my pad printer needs?
Remove the existing ring and measure its outer diameter, inner diameter, and overall height. Identify the blade and bevel configuration, then compare these details with the original equipment specifications or the replacement supplier’s drawing.
Are all 90 mm pad printing ink cup rings interchangeable?
No. The nominal 90 mm designation may not describe the same dimension across different product ranges. Rings can also differ in inner diameter, height, edge design, and mounting geometry. Confirm the complete specifications before purchasing.
Can I measure a ceramic ink cup ring with a ruler?
A ruler may provide a rough diameter estimate, but it is generally unsuitable for identifying a precision replacement. A digital caliper is preferable for measuring OD, ID, and height.
Does a double-edge ceramic ring require different measurements?
The primary measurements remain OD, ID, and overall height. However, both working edges and their bevel configurations must also be identified. Measure the complete height rather than assuming it matches a single-edge ring of the same diameter.
Can a ceramic ring be replaced with a carbide ring of the same size?
Possibly, but equal dimensions do not guarantee compatibility. The blade geometry, mounting arrangement, printing plate material, and operating conditions must also be considered.
Can I order a custom ink cup ring without knowing the machine model?
Yes, in many cases. A supplier may be able to identify or manufacture a replacement using accurate dimensions, photographs, technical drawings, and a physical sample. The machine model remains useful supporting information.
Get the Right Replacement Ring from ENGYPRINT
Measuring a pad printing ink cup ring correctly can prevent unnecessary downtime, ink leakage, and repeated replacement orders.
For most round rings, begin with OD × ID × H, then verify the blade and bevel configuration, material, and mounting compatibility.
When the existing ring is worn, damaged, or nonstandard, provide a technical drawing or sample rather than relying on nominal sizes.
ENGYPRINT supplies standard and customized ceramic rings, carbide rings, oval rings, and complete sealed ink cup assemblies for industrial pad printing applications.
Whether you are replacing a single worn ring or sourcing consumables for multiple production machines, accurate specifications are the starting point for a reliable replacement.
Contact ENGYPRINT with your measurements, ring photographs, or technical drawings to request suitable replacement options and a quotation.
Related Reading
- Why Is My Pad Printing Ink Cup Leaking? 7 Causes and Fixes
- Sealed Ink Cup for Pad Printing: A Complete Beginner’s Guide
- Sealed Ink Cup System Explained: Components and Working Principle
- 90mm vs 100mm Ink Cup for Pad Printing: Which One Should You Choose?
- Pad Printing Machine Spare Parts: What Buyers Should Prepare
- Pad Printing Machine Accessories Guide