I. Introduction: The Complexity of Plastic Decoration
In the modern manufacturing landscape, plastic is no longer just “the cheap alternative.” From high-precision medical housings and aerospace switches to ergonomic consumer electronics, plastic parts are becoming more complex in both their chemical composition and their physical geometry. As a result, the question of how to apply a logo, safety warning, or functional marking has become a primary concern for production managers.
If you are currently evaluating your options, you are likely caught in the classic debate: Should you invest in a Pad Printing machine or a Screen Printing system? While both have their merits, they are fundamentally different tools. The primary reason a pad printing machine is often better for plastic parts is its ability to transfer high-resolution images onto 3D surfaces, curved geometries, and recessed areas where a flat, rigid screen cannot maintain contact.
In this guide, we will share the technical nuances of these two titans of the printing industry. Our goal is to move past the marketing fluff and help you understand which process will deliver the highest quality and the best ROI for your specific plastic substrates.
II. Process Breakdown: The Indirect vs. Direct Approach
To understand which works better, we must first look at the physics of how ink moves from the machine to your plastic part.
1. Pad Printing: The Indirect “Offset” Method
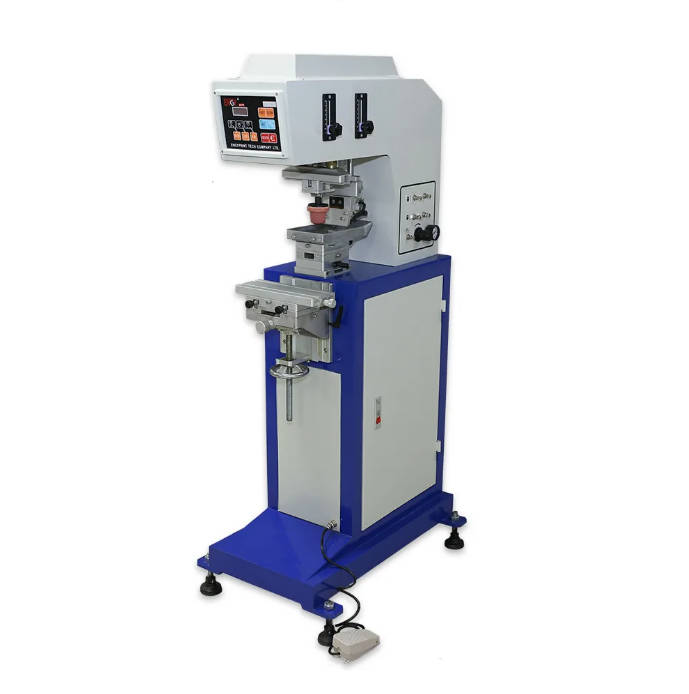
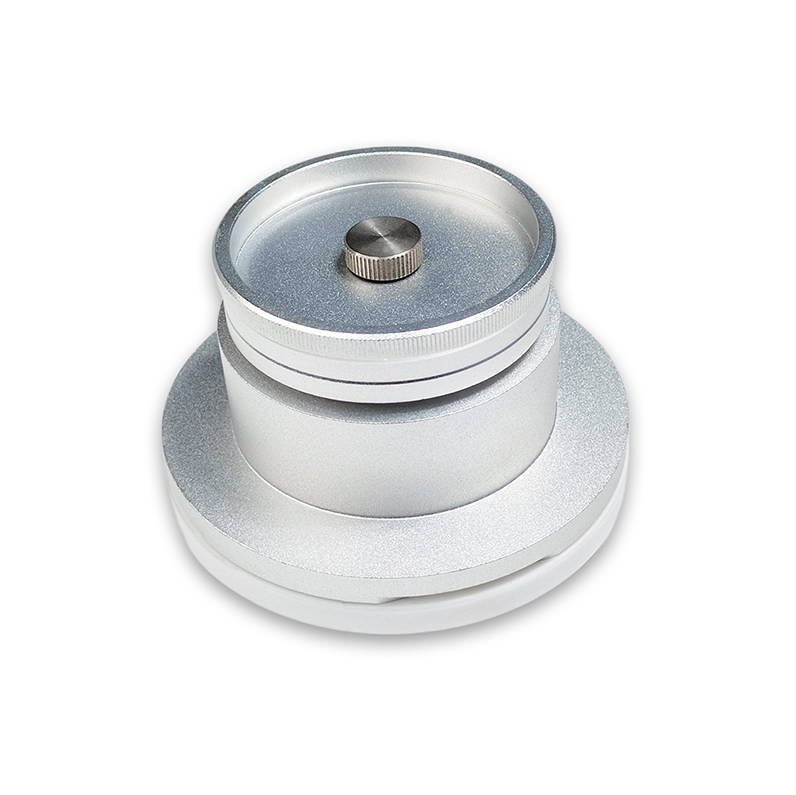
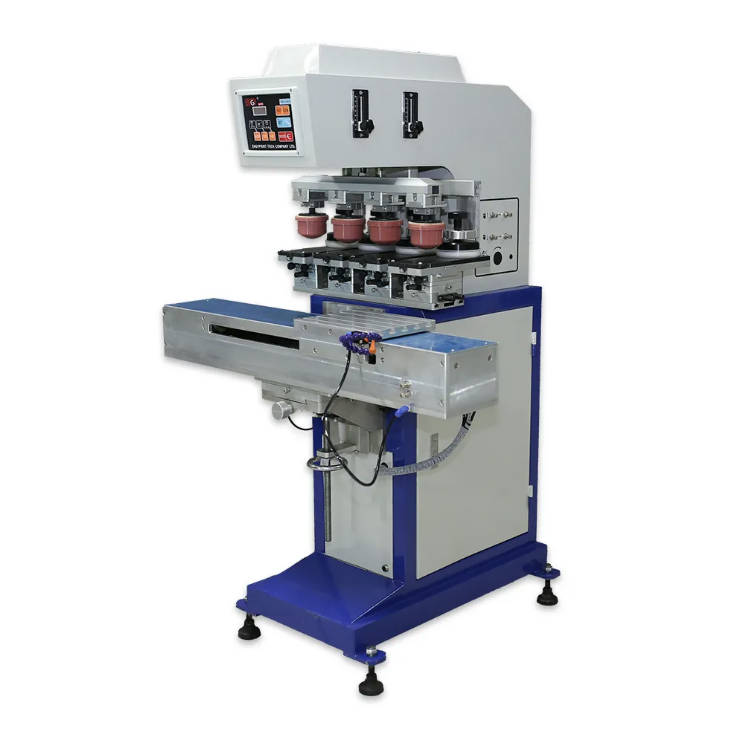
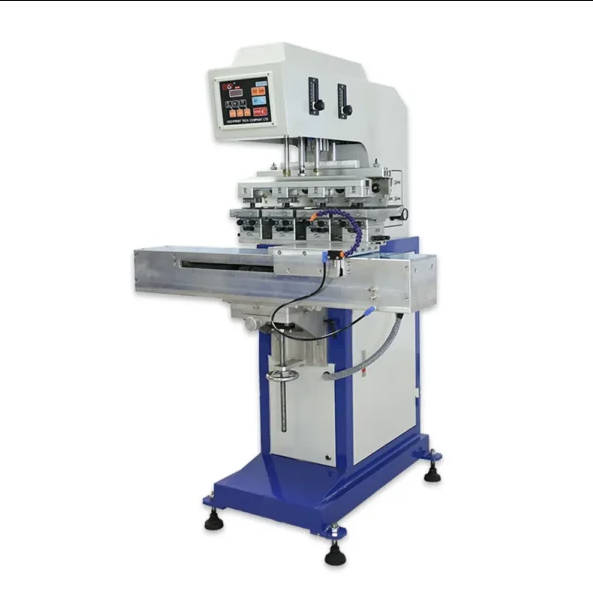
Pad printing machine is a pad printing process. It involves three main components: the cliché (a plate with the image etched into it), the ink, and the silicone pad.
- The Pickup: The pad presses onto the inked cliché, picking up a thin layer of ink.
- The Transfer: The pad then moves over to the plastic part and presses down. Because the silicone pad is soft and flexible, it wraps around the product.
- The Release: As the pad lifts, the ink stays on the plastic because the surface energy of the part is higher than that of the silicone.
2. Screen Printing: The Direct “Pass-Through” Method
Screen printing is a direct process. Ink is placed on a mesh screen that has been “blocked out” everywhere except for the artwork.
- The Squeegee: A rubber squeegee pushes the ink through the open mesh directly onto the substrate.
- The Contact: The screen must be in close, parallel contact with the part during the entire stroke. This is why screen printing is naturally suited for flat or perfectly cylindrical surfaces.
III. The Geometry Advantage: 3D Shapes vs. Flat Surfaces
This is the “make or break” factor for most plastic part manufacturers. Plastic molding allows for incredible geometric freedom—curves, textures, recesses, and compound angles—but this freedom creates a nightmare for traditional printing.
Why Screen Printing Struggles with 3D
Because a screen is a tensioned mesh, it wants to stay flat. If you try to screen print on a plastic part with a slight curve or a recessed “valley,” the screen will bridge across the gap, leading to “ghosting,” smearing, or a total lack of ink transfer in the low spots. Even with specialized rotary screen printers for bottles, you are limited to a fixed radius.
The Flexibility of the Pad Printing Machine
A pad printing machine solves the “impossible” parts. Because the silicone transfer pad can be molded into various shapes and hardnesses (durometers), it acts like a 3D carrier that can conform to irregular surfaces, print into deep recesses, and wrap around compound curves without distorting the image.
IV. Print Quality: Fine Detail vs. Ink Thickness
When we talk about “which works better,” we must define what “better” looks like on the final product.
1. Resolution and Sharpness
If your plastic part requires tiny “UL” safety symbols, 4-point font instructions, or a highly detailed corporate logo, pad printing is the undisputed winner. Clichés for pad printing are typically made using laser etching or photochemical processes that can capture incredibly fine lines. Because the silicone pad picks up this film and transfers it without the “mesh interference” found in screen printing, the edges of the print remain crisp and sharp even under a magnifying glass.
2. Opacity and “Lay-Down”
This is the area where screen printing shines. Because the ink is pushed through a mesh, you can deposit a much thicker layer of ink (typically 20–50 microns) compared to pad printing (typically 5–10 microns).
- Screen Printing: Ideal if you need a “bright white” logo on a “jet black” plastic part in a single pass.
- Pad Printing: If you need high opacity on a dark part, you may need a pad printing machine capable of a “double-hit” (printing twice in the same spot). However, modern high-pigment inks have significantly narrowed this gap.
3. Half-tones and Gradients
For photographic images or complex gradients on plastic, pad printing’s ability to vary the “etch depth” of the cliché allows for sophisticated shading. While screen printing can do this via “halftone dots,” the results on plastic parts are often grainier than the smooth transitions achieved by a pad printer.
V. Material Science: Ink Adhesion and Plastic Substrates
Durability is the second most important metric. If the logo scratches off with a fingernail, the printing method has failed.
Plastic is a “low surface energy” material, meaning it often repels ink like a non-stick pan repels water. To solve this, both pad and screen printing utilize specialized industrial inks, but their application differs. Pad printing inks are uniquely engineered with high-evaporation-rate solvents that allow the ink to become “tacky” during the transfer process, which is essential for achieving a molecular bond with difficult plastics like Polypropylene (PP) and Polyethylene (PE).
V. Material Science: Ink Adhesion and Plastic Substrates
One of the most common frustrations in plastic decoration is “Adhesion Failure.” You have a beautiful print, but it flakes off under a fingernail or fades after contact with skin oils. Whether you choose a screen or a pad printing machine, the ink must perform a molecular “handshake” with the plastic.
1. The “Bite” Factor: Solvent-Based vs. UV Inks
Plastic is naturally non-porous and often has low surface energy.
- Pad Printing Advantage: Pad printing inks are uniquely formulated with high-evaporation-rate solvents. As the pad travels from the cliché to the part, the solvent begins to evaporate, making the ink “tacky.” This tackiness is what allows the ink to “bite” into the plastic surface.
- Screen Printing: While screen inks also offer great adhesion, they often rely on a thicker “film” that sits on top. For plastics like Polypropylene (PP) or Polyethylene (PE), this can sometimes lead to peeling if the surface isn’t perfectly prepared.
2. The Power of 2-Component (2K) Inks
For automotive and medical parts, durability is non-negotiable. The most effective way to ensure long-term durability on plastic is to use a 2-component ink system—consisting of a base ink and a hardener—which creates a chemical cross-linking bond that is virtually impossible to remove once fully cured. This “epoxy-like” finish is a standard feature for pad printing machines used in high-stress environments.
3. Surface Pre-treatment (The Dyne Level)
Before printing, we always recommend a “Dyne Test” to measure surface tension. For most plastics, you need a Dyne level of 38–42 for successful printing. If your part is “low energy,” you may need:
- Corona Treatment: An electrical discharge that “roughens” the surface at a microscopic level.
- Flame Treatment: Briefly passing a flame over the part to oxidize the surface.
- Plasma Treatment: The “Gold Standard” for complex 3D medical parts.
VI. Production Logistics: Setup, Speed, and Automation
In a modern factory, the “Time to Print” is just as important as the “Quality of Print.”
1. Setup and Changeover
- Screen Printing: Preparing a screen involves coating mesh with emulsion, exposing it to UV light, and washing it out. If you make a mistake, you have to reclaim the screen and start over.
- Pad Printing: Etching a cliché (plate) is often faster and cleaner, especially with modern laser cliché makers. A major logistical advantage of a pad printing machine is the use of closed ink cups, which prevent ink from drying out during downtime and allow for “Job Changeovers” in under 10 minutes.
2. Cycle Speeds and Throughput
For small plastic parts (under 10cm), pad printing is significantly faster. A standard pneumatic or electric pad printer can cycle 1,000 to 3,000 times per hour. Screen printing, while fast for large posters, involves a longer mechanical stroke that naturally limits its “parts-per-hour” on small 3D components.
3. Automation Integration
Because pad printing machines have a smaller footprint and “reach” into the part, they are much easier to integrate into robotic assembly cells. You can mount a pad printing head directly over a conveyor or next to a robotic arm that is already handling the plastic housing.
VII. Cost Analysis: The “Per-Part” Reality
To help your procurement team, we’ve broken down the cost factors of running these two systems over a standard production year.
| Cost Factor | Pad Printing | Screen Printing |
| Consumables | Silicone Pads ($30-$100) | Mesh/Screens ($20-$80) |
| Tooling Life | Clichés (20k to 1M+ prints) | Screens (5k to 50k prints) |
| Ink Waste | Low (Closed Cup system) | High (Open Screen exposure) |
| Setup Time | 10–20 Minutes | 30–60 Minutes |
| Labor Requirement | Low (Often Automated) | Moderate to High |
| Space Required | Compact (Desktop to Floor) | Large (Requires drying racks) |
The “Sweet Spot” for ROI
From a financial perspective, pad printing is the most cost-effective choice for plastic parts with small-to-medium image sizes (under 150mm) and production volumes exceeding 1,000 units, due to the extreme longevity of steel clichés and minimal ink waste.
VIII. Expert Insight: 4 Critical Questions to Solve Your Dilemma
When we consult with manufacturers, we ask these four questions to settle the debate instantly:
- “Does your part have a flat surface larger than a dinner plate?” * If yes, Screen Printing is your winner for speed and opacity.
- “Is your artwork full of tiny text or intricate logos?”
- If yes, Pad Printing is required for the necessary resolution.
- “Are you printing on a curved or recessed surface?”
- If yes, don’t even try screen printing; the Pad Printing machine is the only viable tool.
- “Do you need to change designs five times a day?”
- If yes, the fast setup and “Recipe Recall” of an electric pad printer will save you thousands in labor costs.
IX. Conclusion: The Verdict for Plastic Manufacturers
Both screen and pad printing are essential tools, but they serve different masters. Screen printing is a “graphic” process designed for flat surfaces and vibrant, large-scale displays. Pad printing is a “product” process designed for the complex, 3D world of modern manufacturing.
For 90% of plastic components—from automotive buttons and medical syringes to electronic housings—the pad printing machine works better because it offers the geometric flexibility to print on any shape and the chemical versatility to bond with any plastic substrate.
If you want your brand to look like it was “part of the product” rather than just “stuck on top,” pad printing is the professional choice. It delivers a level of crispness and durability that survives the lifetime of the product, ensuring your safety warnings remain legible and your logos remain vibrant.
FAQ: Quick Review for Decision Makers
1. Can I use the same ink for both pad and screen printing?
Usually, no. Pad printing inks are formulated with faster-drying solvents to allow for the “tacky” transfer from the pad, whereas screen printing inks stay “open” longer so they don’t clog the mesh pores during the run.
2. Is pad printing ink safe for medical plastics?
Yes. There are specific medical-grade ink series (Class VI certified) designed specifically for pad printing machines that are used on catheters, syringes, and surgical tools. These inks are biocompatible and survive sterilization.
3. Why is pad printing more popular for automotive plastics?
Automotive interiors are full of “Soft-Touch” textures and curved buttons. Pad printing is the only method that can conform to these textures while using high-durability 2K inks that resist sweat, lotions, and UV light.
4. How many colors can I print with a pad printer?
Most industrial machines can handle 1 to 6 colors in a single pass. Some advanced systems with rotary tables can handle even more, providing full-color photographic results on plastic.
5. Does pad printing work on “hard-to-stick” plastics like Polypropylene?
Yes, but it usually requires a pre-treatment (like flame or corona) or a specialized “PP Primer.” Once treated, pad printing offers some of the best adhesion results in the industry.