A sealed ink cup system is an advanced, self-contained ink delivery method used in pad printing that houses the ink in an inverted cup sealed against the printing plate (cliché) by a sharp doctoring ring. This design minimizes solvent evaporation, ensures consistent ink viscosity, and creates a safer, cleaner working environment, making it the industry standard for high-quality, efficient printing on three-dimensional objects. Its primary function is to both hold the ink and precisely “doctor” or scrape the printing plate, leaving ink only in the desired etched image area for pickup by the silicone pad.
Table of Contents
- What is a Sealed Ink Cup System in Pad Printing?
- Why Did the Sealed Ink Cup Revolutionize Pad Printing? (The Open Inkwell Problem)
- The Anatomy of a Sealed Ink Cup System: Key Components Unpacked
- How Does a Sealed Ink Cup System Work? The Step-by-Step Printing Cycle
- What Are the Major Advantages of Using a Sealed Ink Cup?
- Maintenance and Best Practices for Your Sealed Ink Cup System
- Choosing the Right Sealed Ink Cup System for Your Application
- Conclusion: The Clear Choice for Modern Pad Printing
What is a Sealed Ink Cup System in Pad Printing?
In the world of industrial printing, particularly pad printing, precision and consistency are paramount. The sealed ink cup system, also known as a closed ink cup, represents a significant technological leap forward in achieving these goals. It is a sophisticated assembly designed to contain printing ink in a controlled environment. Unlike older methods, the ink is held upside down within a cup, which is pressed firmly against the flat printing plate, or cliché. The rim of this cup is an ultra-hard, precisely machined ring that creates a tight seal, preventing the ink from spilling and, more importantly, stopping the volatile solvents within the ink from evaporating into the air.
This system ingeniously combines the function of an ink reservoir with that of a doctor blade. As the cup moves across the cliché, its sharp ring edge scrapes away all excess ink from the surface, leaving a perfect deposit of ink only within the shallow, etched portion of the plate that forms the image. This dual-action mechanism is the core reason for its efficiency and the high-quality results it produces. By controlling the ink’s environment, the sealed cup ensures that the ink’s properties, especially its viscosity (thickness), remain stable throughout a long print run, which is critical for consistent image transfer and color density from the first product to the thousandth.
Why Did the Sealed Ink Cup Revolutionize Pad Printing? (The Open Inkwell Problem)
To fully appreciate the sealed ink cup, one must understand the system it replaced: the open inkwell. The traditional open system involved a simple trough or “well” of ink into which a spatula-like doctor blade would dip and then scrape across the cliché. While functional, this method was fraught with problems that the sealed cup was specifically engineered to solve. The primary issue was constant exposure of the ink to the atmosphere.
This exposure led to rapid evaporation of solvents, the chemical agents that keep the ink in a liquid state. As solvents evaporated, the ink’s viscosity would change, becoming thicker and less transferable. Operators had to constantly monitor the ink, adding thinners to maintain consistency—a difficult and often imprecise process. Furthermore, this evaporation released Volatile Organic Compounds (VOCs) into the workplace, posing health risks to operators and environmental concerns. Open wells were also messy, prone to contamination from dust and debris, and resulted in significant ink and solvent waste. The sealed ink cup directly addressed every one of these shortcomings.
| Feature | Open Inkwell System | Sealed Ink Cup System |
|---|---|---|
| Ink Exposure | Constantly exposed to air. | Contained within the cup, minimal exposure. |
| Solvent Evaporation | High, leading to rapid viscosity changes. | Up to 95% reduction; highly stable viscosity. |
| VOC Emissions | High, creating health and safety concerns. | Minimal, resulting in a much safer workspace. |
| Ink Waste | High, due to skinning, contamination, and cleanup. | Very low, as ink is protected and reusable. |
| Print Consistency | Varies during a print run; requires constant adjustment. | Excellent from start to finish. |
| Setup & Cleanup | Time-consuming and messy. | Fast, clean, and straightforward. |
The Anatomy of a Sealed Ink Cup System: Key Components Unpacked
A sealed ink cup system is an elegant piece of engineering with a few critical components that work in perfect harmony. Understanding each part’s function is key to mastering the pad printing process.
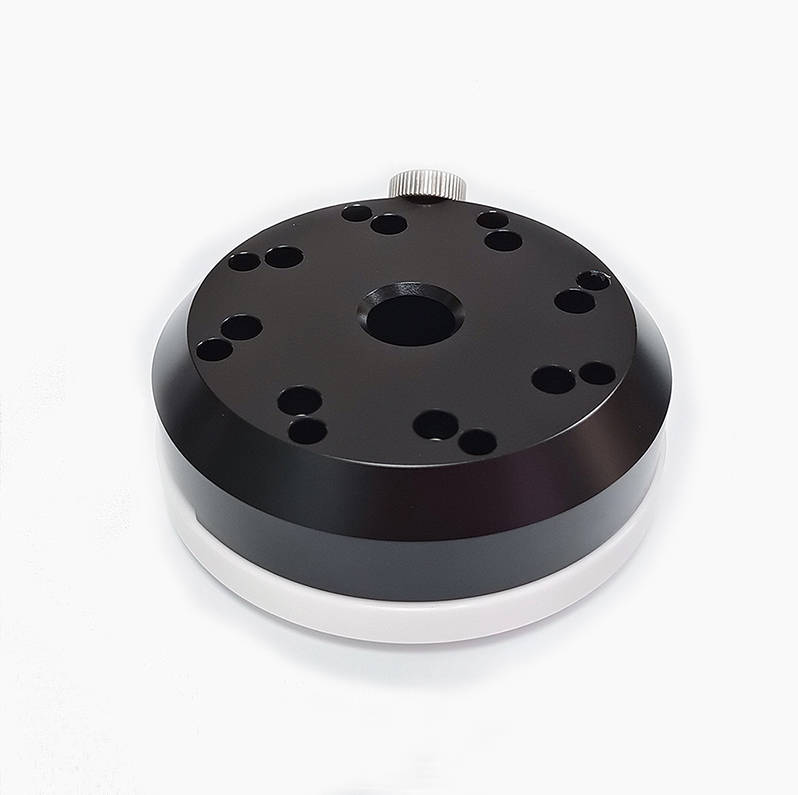
The Ink Cup Itself
The main body of the system, the cup, acts as the ink reservoir. It is typically machined from hard-coated aluminum for durability and chemical resistance, though some disposable or smaller versions can be made from specialized plastics. The cup’s design often incorporates strong magnets around its perimeter. These magnets are not for holding the cup to the machine but are for attracting the steel cliché plate upwards, ensuring a consistently tight seal against the doctoring ring under pressure. The volume of the cup determines how much ink it can hold, which dictates how long a machine can run before needing a refill.
The Doctoring Ring (The Heart of the System)
The single most critical component is the doctoring ring. This is the fine-edged ring attached to the open side of the ink cup. While early versions were made of steel, the modern standard is white or black ceramic (Zirconia). Ceramic is used for its extreme hardness (approaching that of a diamond), exceptional wear resistance, and the ability to be polished to an incredibly sharp, smooth, and perfect edge. This flawless edge is what allows the ring to glide over the cliché and shear off the excess ink cleanly without scratching the plate. Any chip, nick, or imperfection on this ring will result in printing defects like streaks or incomplete doctoring, so its integrity is paramount.
The Cliché (Printing Plate)
The cliché is the flat plate that contains the artwork to be printed. The image is chemically etched or laser-engraved as a shallow recess (typically 19-25 microns deep) into the plate’s surface. The sealed ink cup slides across this plate, and the cliché’s material must be hard enough to withstand the friction of the ceramic ring without premature wear. Clichés are commonly made from hardened steel for very long runs or photopolymer for shorter runs and faster processing. The smooth, flat surface of the cliché is just as important as the sharp edge of the ring for creating the perfect seal that defines the system.
The Silicone Pad
While not technically a part of the ink cup assembly, the silicone pad is the indispensable partner in the process. After the ink cup doctors the cliché, the pad presses down onto the ink-filled etch. Through a combination of silicone’s natural properties and a slight “flash-off” of solvent that makes the ink’s surface tacky, the ink image lifts out of the etch and adheres to the pad. The pad then moves to the product and transfers the ink layer onto its surface. The shape and durometer (hardness) of the pad are chosen based on the object being printed.
How Does a Sealed Ink Cup System Work? The Step-by-Step Printing Cycle
The pad printing process using a sealed ink cup is a cyclical, multi-step operation that repeats with high speed and precision. Here is a breakdown of a single print cycle.
Step 1: The Home Position (Flooding the Etch)
The cycle begins with the sealed ink cup resting directly on top of the etched image area of the cliché. In this “home” position, the cup acts as a reservoir, and the pool of ink inside it completely covers and fills the shallow etch with ink. The seal between the ring and the plate prevents any ink from escaping.
Step 2: The Doctoring Stroke
The machine actuates, sliding the ink cup across the cliché, away from the etched area. As it moves, the sharp, precision-ground ceramic ring acts as a squeegee or doctor blade. It scrapes the surface of the cliché perfectly clean, removing all excess ink. The only ink that remains is the precise volume held within the recessed etch. The surface of the ink in the etch is now exposed to the air for the first time.
Step 3: Ink Pickup
With the doctored cliché now exposed, the silicone pad, which was in its rearmost position, moves forward and downward, compressing onto the ink-filled etch. A momentary “dwell” allows the solvents on the ink’s surface to flash off slightly, making it tacky. This tackiness, combined with the rolling action of the compressing pad, causes the ink layer to lift cleanly from the etch and adhere to the surface of the silicone pad, forming a perfect, mirrored representation of the image.
Step 4: Printing and Transfer
The pad, now carrying the ink image, lifts off the cliché and travels forward over the part or substrate being printed. It then moves downward, compressing onto the object. The rolling action and pressure cause the ink layer, which is more attracted to the substrate than the silicone pad, to release and transfer onto the part. The pad’s flexible nature allows it to conform to curved, textured, or irregular surfaces, which is the primary advantage of pad printing.
Step 5: The Return Stroke
As the pad lifts off the printed part and returns to its starting position, the ink cup simultaneously slides back across the cliché to its home position, once again covering the etch. This floods the image area with fresh ink, protects it from the air, and prepares the entire system for the next cycle to begin instantly.
What Are the Major Advantages of Using a Sealed Ink Cup?
The widespread adoption of the sealed ink cup system is a direct result of its numerous and significant benefits over older technologies. These advantages impact print quality, operational costs, and workplace safety.
- Reduced Solvent Evaporation: By keeping the ink contained, sealed cups can reduce solvent and thinner consumption by as much as 95%. This drastically lowers costs associated with expensive consumables.
- Consistent Ink Viscosity: Because solvents aren’t evaporating, the ink’s viscosity remains stable for hours, even days. This is the key to achieving uniform print quality, color, and opacity throughout an entire production run without operator intervention.
- Cleaner and Safer Operation: With no open trough of ink, spills and splashes are virtually eliminated. More importantly, the massive reduction in VOC emissions creates a healthier and safer environment for machine operators, often eliminating the need for specialized ventilation systems.
- Substantial Cost Savings: The savings are multi-faceted. Less ink is wasted due to drying or contamination. Less solvent is used for thinning and cleanup. And less labor is required for monitoring ink and cleaning up messes, all contributing to a lower cost-per-print.
- Faster Setup and Cleanup: A sealed ink cup is a self-contained unit. It can be quickly installed on a machine, and at the end of a job, it can be removed, capped, and stored for later use, saving the ink. Cleanup is faster and requires far less solvent than scrubbing an entire open inkwell and doctor blade assembly.
Maintenance and Best Practices for Your Sealed Ink Cup System
To ensure a long life and consistent performance from your sealed ink cup, proper maintenance is crucial. The focus of all maintenance is preserving the integrity of the ceramic doctoring ring.
Proper Cleaning Procedures
When cleaning, always use solvents recommended by the ink manufacturer. Disassemble the cup carefully, ensuring the ceramic ring does not get dropped or hit against a hard surface. Use soft, lint-free cloths to wipe the ring and cup components. Never use metal scrapers, razor blades, or abrasive pads on the ceramic ring, as this will damage its delicate edge. Once clean, inspect the components before reassembly and storage.
Inspecting the Doctoring Ring for Damage
The ceramic ring is the most important—and most fragile—part of the system. Before each use, carefully inspect its sharpened edge for any signs of damage. Run a fingernail gently along the edge to feel for microscopic nicks or chips that may not be visible to the naked eye. Look for hairline cracks. A damaged ring is the number one cause of printing problems like streaking and must be replaced immediately to avoid poor quality prints and potential damage to your clichés.
Common Troubleshooting Tips
Understanding common issues can save significant downtime. A well-maintained system should be trouble-free, but problems can arise, most often related to the ring or setup.
| Problem | Potential Cause(s) | Solution(s) |
|---|---|---|
| Ink leaking from under the cup | 1. Damaged (chipped) ceramic ring. 2. Debris under the ring. 3. Insufficient cup pressure. 4. Warped or damaged cliché. | 1. Replace the ring. 2. Clean the ring and cliché surface. 3. Increase machine pressure on the cup. 4. Inspect and replace the cliché. |
| Streaks in the print (poor doctoring) | 1. Chipped or worn ceramic ring. 2. Dried ink on the ring edge. 3. Scratched cliché. | 1. Replace the ring. 2. Thoroughly clean the ring edge. 3. Polish or replace the cliché. |
| Premature ring wear | 1. Excessive cup pressure. 2. Using overly abrasive ink. 3. Printing on a rough or damaged cliché. | 1. Reduce cup pressure to the minimum required for a good seal. 2. Consult ink supplier. 3. Ensure clichés are smooth and well-maintained. |
Choosing the Right Sealed Ink Cup System for Your Application
When selecting a sealed ink cup, the primary consideration is size. The cup’s diameter must be larger than the entire image area on the cliché, including a small buffer zone on all sides. This ensures the cup can fully cover and flood the etch when in its home position and fully expose it after the doctoring stroke. For multi-color jobs, you will need a separate sealed ink cup and cliché for each color. Finally, ensure the cup’s mounting system is compatible with your specific brand and model of pad printing machine, as mounting styles can vary.
Conclusion: The Clear Choice for Modern Pad Printing
The sealed ink cup system is more than just an accessory; it is a foundational technology that has transformed modern pad printing. By solving the inherent problems of the open inkwell, it delivers unparalleled consistency, efficiency, and safety. Its ability to maintain stable ink viscosity directly translates to higher quality prints, while the dramatic reduction in solvent and ink waste provides a clear and rapid return on investment. For any business involved in pad printing, from small promotional shops to large-scale medical and automotive manufacturing, understanding and properly utilizing the sealed ink cup system is not just a best practice—it is essential for remaining competitive and producing superior results.
sealed ink cup system, pad printing ink cup, how does a sealed ink cup work, sealed ink cup components, sealed ink cup vs open inkwell, sealed ink cup advantages, pad printing process explained, sealed ink cup maintenance, ceramic ink cup ring